Microsoft has recently added an exciting feature set called SharePoint Advanced Management to the Microsoft Syntex product family – I’ll use the acronym SAM to refer to it throughout this blog. This feature set is specifically targeted at SharePoint Online environments and its designed to give SharePoint Administrators capabilities to better govern SharePoint and OneDrive and to enhance secure collaboration within Microsoft 365. Lets take a quick look at each feature available in SAM.
A Word About Licensing
First, its important to note that the SAM features are available through a per-user license. The license required actually differs depending on which feature you ‘re considering. Some features are only available with the SharePoint Advanced Management Plan 1 license and some also available if you have a Microsoft 365 E5 license (or equivalent).

The fact that the license is called “Plan 1” suggests that there might be a Plan 2 coming, but we have not heard anything about that yet. You need to consider the license you need on a feature by feature basis, and validate any license purchase decisions with your Microsoft representative. We’ll go into the individual feature licenses below. A few other licensing details to consider:
- If you are going to access these features through the SAM license, then you need a license for every user in your organization
- Users must also have a SharePoint license, either K, P1 or P2 through an M365 license
- Licenses are not required for guest users
We’ve recently heard that Microsoft Syntex is generally moving to a consumption based license model for its Content AI features, requiring that you have an Azure Pay as You Go license to make use of Content AI models. However, some Syntex features will still be licensed through a per-user license, and the SAM feature set is one of those.
Permissions and Administration
SAM features are generally administered either through the SharePoint Admin Center or through PowerShell. To administer SAM features you need to have the SharePoint Administrator role. However, some features can be administered by Site Owners.
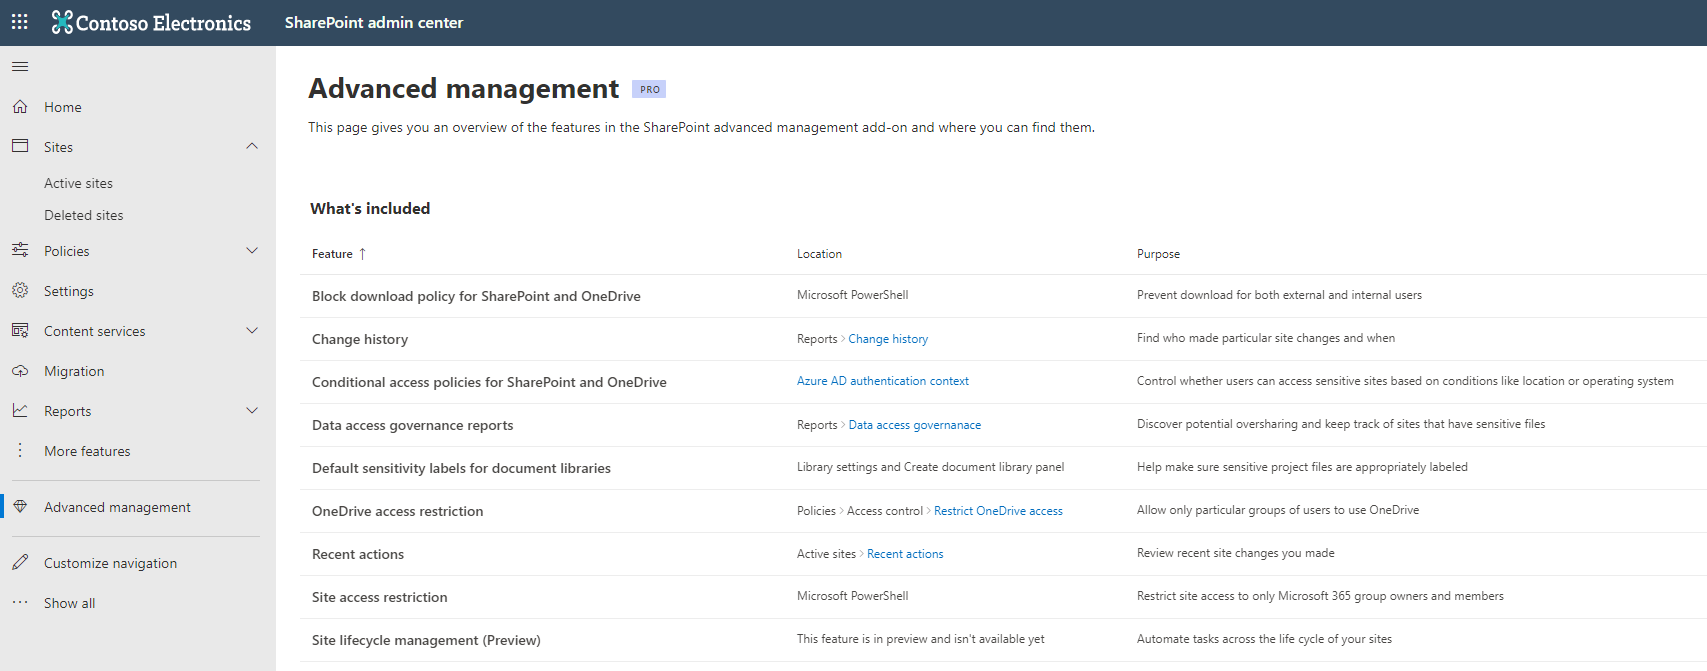
Once you add a SAM license to your tenant, there is a new page which appears in the SharePoint Admin Center. This serves as a useful central location where you can see all of the SAM features available, and find out where you administer them. You can access that page by navigating to the SharePoint Admin Center and selecting Advanced Management in the left hand menu.
Introduction to the SAM Features
Lets go through each feature one at a time and see how you can use them in your environment.
1. Block Download Policy for SharePoint and OneDrive
You can block the download of files from SharePoint sites or OneDrive to protect against data loss when users downloading files to a computer, perhaps a personal device, and leaving them there. With this policy enabled, users can still work with and edit files in the web browser, but they simply won’t be able to download them or access them through the desktop versions of Microsoft Word, Excel, PowerPoint or other apps.
Today, you can already implement this for SharePoint sites and Microsoft Teams using Sensitivity Labels applied that are applied to sites and teams. However, deploying Sensitivity Labels to an organization can be a large project with many considerations, and if you’re not quite ready for that you can now implement this block policy on specific sites simply through the following PowerShell:
Set-SPOSite -Identity <SiteURL> -BlockDownloadPolicy $true
Here’s a simple example applied to a Finance site:
Set-SPOSite -Identity https://contoso.sharepoint.com/sites/Finance -BlockDownloadPolicy $true
There are also some other really helpful parameters:
- -ExcludeBlockDownloadPolicySiteOwners $true which this lets you exclude the site owners from this policy, so site owners can download files but others cannot
- – ExcludeBlockDownloadGroupIds <comma seperated group its> which lets you specify one or more groups to exclude from the policy
Finally, Microsoft has recently released a new parameter in preview, which allows you to specifically block the download of Teams Meeting Recordings. This will affect all recordings stored in all SharePoint sites and OneDrive, but it only affects those recordings that are created by the Teams service. It doesn’t block download for meeting recordings that are manually uploaded, nor those that were created by the Teams service before the feature was enabled.
Set-SPOSite –BlockDownloadFileTypePolicy <$true> -BlockDownloadFileTypeIds TeamsMeetingRecording
What I love about this is that the parameter is named -BlockDownloadFileTypeIds which suggests Microsoft might open this up to other file types in the future so we could get really specific. No word on if that will happen yet.
Licensing: This feature requires the Microsoft Syntex – SharePoint Advanced Management license.
2. Change History
SharePoint Admins can create and download detailed CSV reports of all site actions performed by administrators or site admins within the last 180 days. This feature is accessed in the SharePoint Admin Center, by clicking Reports > Change History in the left hand menu. You click +New Report, you specify a few parameters like a report name, timeframe, all sites or specific sites, all admins or specific admins and then click Create Report.
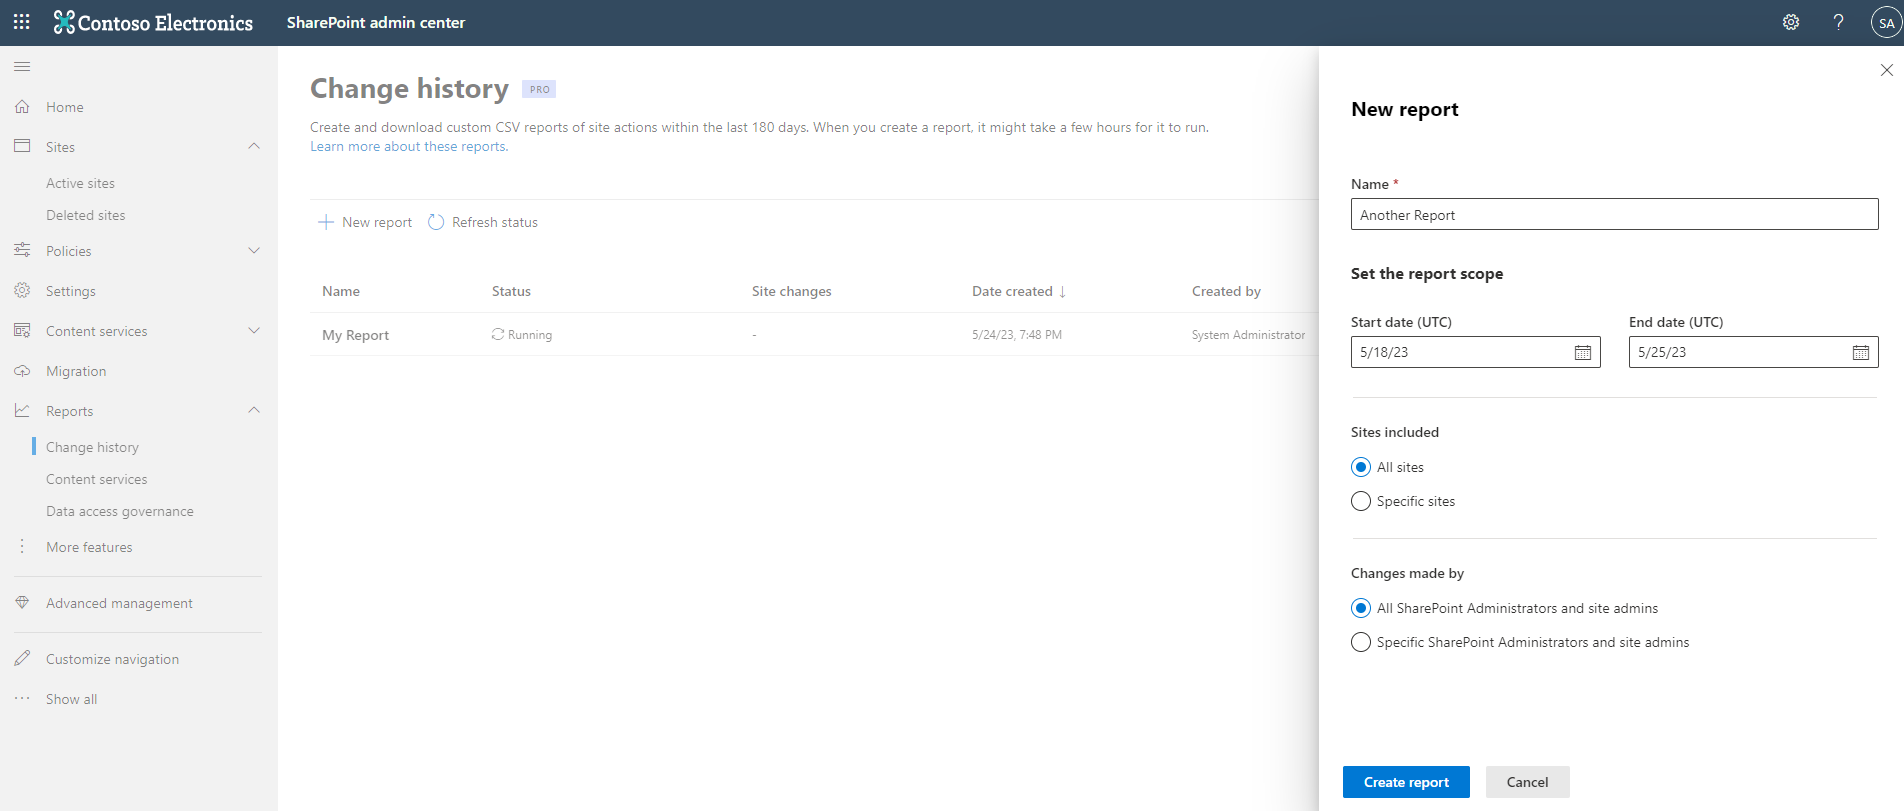
Depending on the parameters you specify and the size of your environment, the report can take several hours to run. Since the report is pulling data from the Unified Audit Log, the data which ends up in the report depends on the license assigned to the individual admins. So you can end up with some admins that have data included from the last 180 days, and other users where data is not included. Once created, you can download the report as a CSV file.
Licensing: This feature requires the Microsoft Syntex – SharePoint Advanced Management license.
3. Conditional Access Policies for SharePoint and OneDrive
Conditional access policies are a great feature in Azure AD which allows us to truly implement a Zero Trust Architecture, where we are constantly verifying that users have access to specific resources under their current conditions. We can already implement this feature on specific SharePoint sites by creating an Authentication Context in Azure AD, which we then assign to a Sensitivity Label (scoped for sites and teams), which we then assign to a site. However, as mentioned earlier, rolling out Sensitivity Labels for sites and teams is usually a big project with a lot of complex considerations. If your organization is not ready for that, they can now use this feature to still get the benefits of Conditional Access policies that are enforced on specific sites.
There are a lot of real-world scenarios where you might use this feature, but two examples where I’ve seen it used are:
- Require external guests to agree to a Terms of Use policy before they can access a site with sensitive information.
- Require users to fulfil additional authentication requirements, like using a finger print scanner on a FIDO2 key, to access a site with very sensitive information.
You can implement this feature by following 3 simple steps:
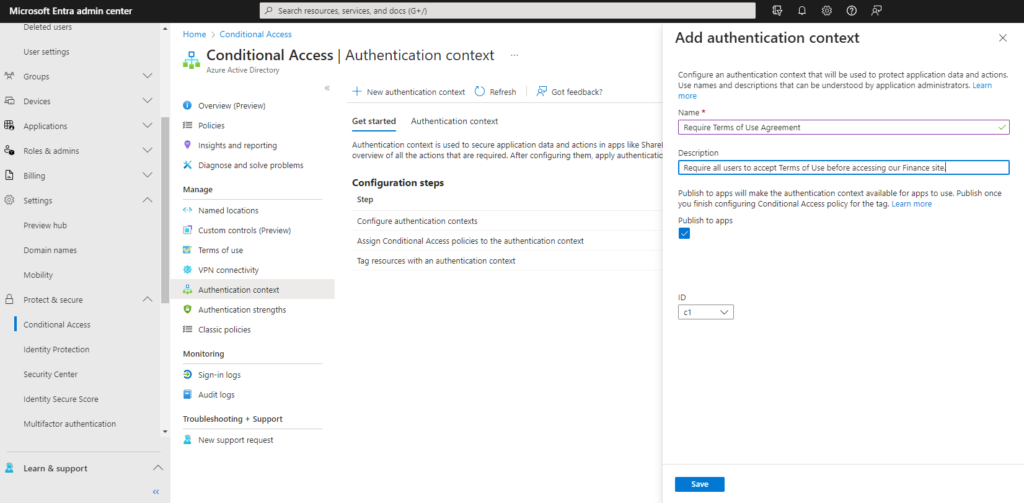
- Create an Authentication Context in the Azure AD Admin Center > Azure Active Directory > Conditional Access > Authentication Context. You only need to provide a name and description for the auth. context when you do this.
- Create a Conditional Access Policy in Azure AD which applies to that authentication context and has your required conditions and access controls.
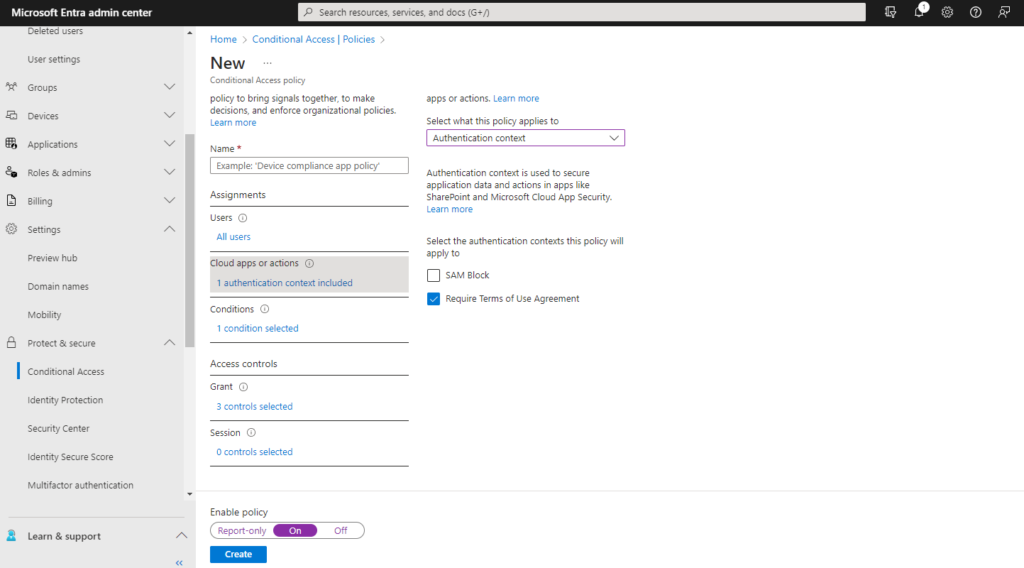
- Apply the authentication context to a site using one of the following methods:
- Apply the auth. context to the site using PowerShell: Set-SPOSite -Identity https://contoso.sharepoint.com/sites/Finance -ConditionalAccessPolicy AuthenticationContext -AuthenticationContextName “Require Terms of Use Agreement”
- Apply the auth. context to the site using a Sensitivity Label scoped for sites and teams
Licensing: This feature is available if you have one of the following licenses:
- Microsoft Syntex – SharePoint Advanced Management
- Microsoft 365 E5/A5/G5
- Microsoft 365 E5/A5/G5/F5 Compliance
- Microsoft 365 E5/F5 Information Protection & Governance
- Office 365 E5/A5/G5
4. Data Governance Reports
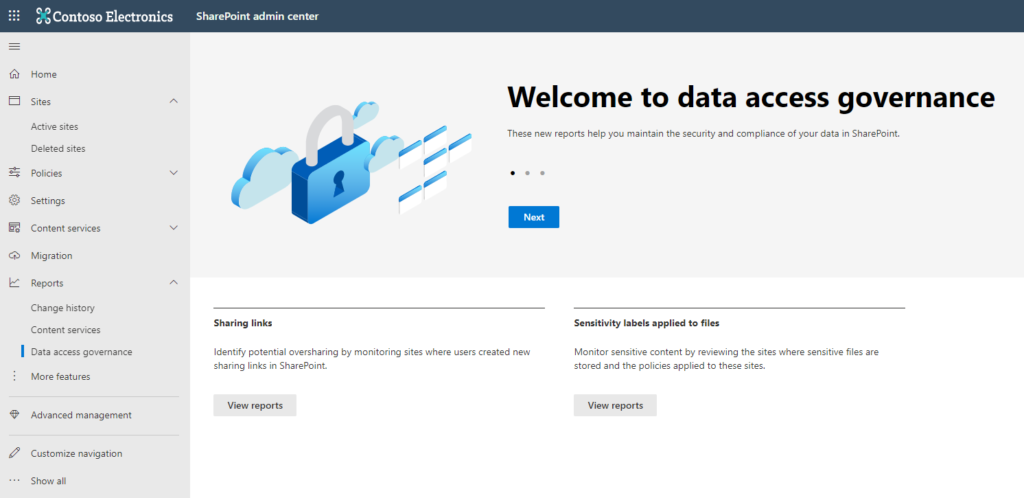
Data Governance Reports can be accessed by navigating to the SharePoint Admin Center > Data Access Governance in the left hand menu, then click View Reports for the type of report you want. It allows you to run 2 different kinds of reports on your SharePoint environment and you can run multiple instances of each report.
- Report on sites where users created the most sharing links in the last 30 days
- Create a separate report for each of sites with “Anyone links”, sites with “People in the organization” links, sites with “Specific People links that are shared externally.
- Reports can take hours to run depending on the size of your environment
- Each report includes up to 100 sites with the highest number of sharing links created in the last 30 days
- The report output includes policies applied to the site, like site sensitivity, site unmanaged device policy, site external sharing policy, primary admin
- You can download a CSV of the report output
- Report on sites that have Office files with sensitivity labels applied
- You can create one or more reports, and you select the Sensitivity Label to look for when you create the report
- Reports can take hours to run depending on the size of your environment
- Labels included in the report must be scoped for files
- Report will included up to 10,000 sites, and only the sites with the highest number of Office files with the selected Sensitivity Labels
- The report output includes policies applied to the site, like site sensitivity, site unmanaged device policy, site external sharing policy, primary admin
- You can download a CSV of the report output
Licensing: This feature requires the Microsoft Syntex – SharePoint Advanced Management license.
5. Default Sensitivity Labels for SharePoint Document Libraries
This is one of my favorite features, the ability to apply a default Sensitivity Label to a SharePoint Document Library. This means that any Office document you upload to that library will automatically have the default sensitivity label applied. This is an incredibly helpful feature when you are designing a SharePoint Information Architecture that is going to include sensitive content, which all organizations have, and you need to ensure that certain libraries with sensitive info have a baseline level of protection applied by default. We think of this a “location based labeling”.
There are a few important points to be aware of:
- This feature only works in SharePoint libraries, or libraries that are within a site that is part of a team. It does not work in OneDrive.
- The default label is only applied to newly uploaded, created or edited Office documents in the library. It is not applied to documents already at rest in the library when the default is configured. It is actually applied on the upload or save action.
- The label is only applied to a newly uploaded or edited document if it does not already have a higher sensitivity label (a higher priority label).
- The default label will not override a label that is manually applied by a user.
- When creating or editing a document in Office on the web, the default label is immediately applied. If you are using the desktop versions of Microsoft 365 office apps or uploading a document, the timings are slightly different:
- When uploading a file it can take a few min for the label to apply
- With Microsoft 365 office desktop apps, the label is applied when the application is closed
- Some sensitivity labels are not support with this feature, in particular those which “Let users assign permissions when they apply the label” or where user access expires or which require double key encryption.
To implement this feature, you need to ensure that you have:
- Created and published sensitivity labels that are scoped for files and emails, and that they’re published to the users that will select a default label for a library
- You must enable sensitivity label integration for Office files in SharePoint and OneDrive which is implemented via the Purview Information Protection page, and verified using (Get-SPOTenant).EnableAIPIntegration.
- Old-school SharePoint IRM is not already enabled on the library.
- You have site admin permissions (site collection admin) when selecting the label for the library.
Once all of this is complete, navigate to a SharePoint library as a site admin, select the Gear icon > Library Settings. You should see a dropdown from which to select the default sensitivity label.
Licensing: This feature is available if you have one of the following licenses:
- Microsoft Syntex – SharePoint Advanced Management
- Microsoft 365 E5/A5/G5
- Microsoft 365 E5/A5/G5/F5 Compliance
- Microsoft 365 E5/F5 Information Protection & Governance
- Office 365 E5/A5/G5
6. OneDrive Access Restrictions
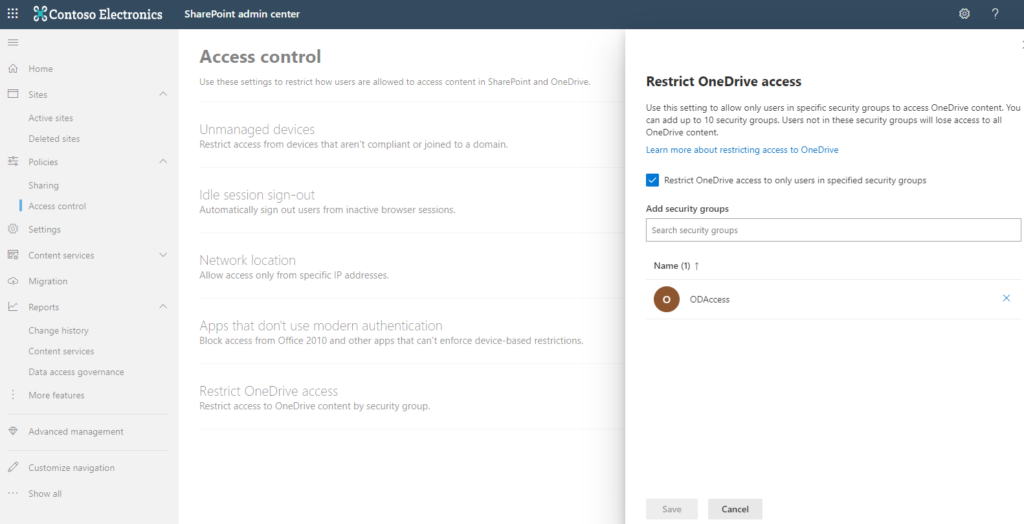
You can restrict access to OneDrive for Business to specific users that are part of a group. When enabling this feature, you can apply one or more (up to 10) groups to have access to OneDrive. You must use Azure AD security groups. Some of the outcomes of enabling this feature are:
- Any users that are not part of these group will not be able to access their OneDrive site, even if they are licensed for it.
- If a user previously had access to their OneDrive site and this feature is enabled and they are not part of the specified groups, they will no longer be able to access OneDrive.
- If users that are not part of the groups previously had files shared with them, and this feature is enabled, they will no longer be able to access those files.
You can configure this feature in the SharePoint Admin Center > Policies > Access Controls > Restrict OneDrive Access.
This feature is a bit of a hammer, but it is useful in controlling oversharing of content from OneDrive.
Licensing: This feature is available if you have one of the following licenses:
- Microsoft Syntex – SharePoint Advanced Management
- Microsoft 365 E5/A5
- Office 365 E5/A5
7. Recent Actions
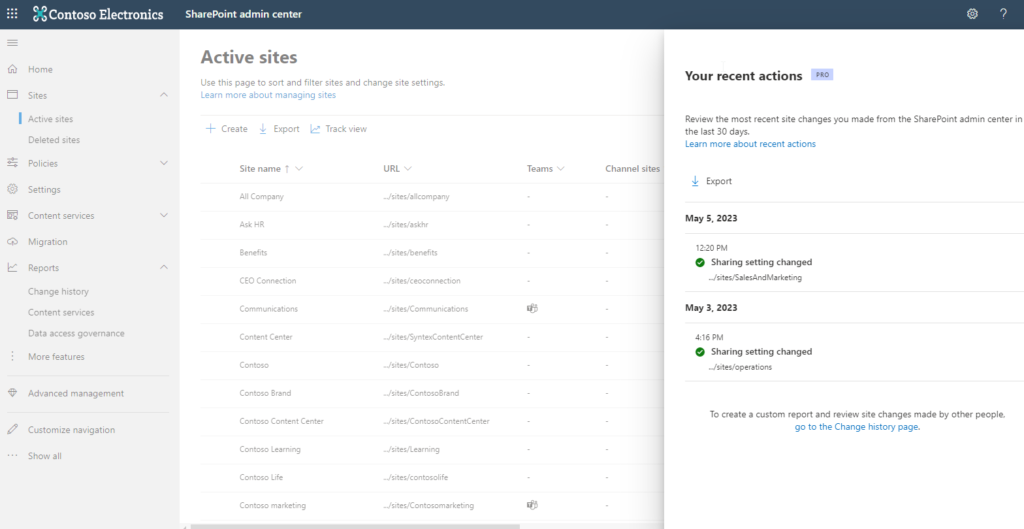
This feature provides an extra panel in the SharePoint Admin Center > Active Sites page, where you can view and export the 39 last actions that you performed as a SharePoint Administrators in the last 30 days. It will only display the changes that you make to site properties as an Admin. Changes made by other administrators won’t appear in the panel. It includes changes to site properties like site name, site creation, site deletion, site URL, sharing settings, storage quota and others. If you have Global Reader permissions, you will not be able to see the Recent Actions panel; you must have SharePoint Administrator Permissions to use it. With this feature you can
- Review the last 30 actions made within the last 30 days in the recent actions panel.
- View more details such as previous and current value of the settings changed and directly access the site details panel to review the change.
- Export and download a. csv file detailing all the changes made within the last 30 days
If you close the browser while actions are in-progress, they will not be recorded in the panel or exported in the.CSV file. As well, failed actions are recorded in the panel, but are removed once you exit the current session and they will not be included in an exported .csv.
Licensing: To fully use this feature as described above you are required to have the Microsoft Syntex – SharePoint Advanced Management license. However, if you don’t have this license, this feature is still available; however, you can only view actions made in the current session and once you close the browser or sign out, the recent actions panel will clear its history.
8. Site Access Restrictions
Use this feature to restrict access to a SharePoint site from users that are not a member of the Microsoft 365 Group that is connected to the site.
- Even if a site has been shared with people outside the group, or if users outside the group were granted file level permissions to access content, enabling this feature will prevent those users from having access.
- Enabling this feature will also prevent users from sharing files with others that are outside the group going forward.
- This feature applies only to Microsoft 365 Group connected SharePoint sites and Teams.
To enable this feature, you must first enable it for the tenant using PowerShell:
Set-SPOTenant -EnableRestrictedAccessControl $true
Then to enable it for a specific site, use the following PowerShell cmdlet:
Set-SPOSite -Identity <siteurl> -RestrictedAccessControl $true
Here is a simple example:
Set-SPOSite -Identity https://contoso.sharepoint.com/sites/FinanceSite -RestrictedAccessControl $true
Licensing: This feature requires the Microsoft Syntex – SharePoint Advanced Management license.
Summing it up…
Depending on your environment, Microsoft Syntex – SharePoint Advanced Management features can provide some great new capabilities that we’ve needed for a long time to help you better govern and secure your SharePoint environments. Features like site restriction policies, data governance reports and applying default sensitivity labels on documents added to libraries are huge improvements that we’ve often looked to PowerShell scripts or third party tools to help us govern in the past. The most exciting thing I find about SAM is that its just a start for Microsoft and I feel that they will continue to add more value here as the Microsoft Syntex product family evolves! We can already see this happening… from the Advanced Management information panel shown at the start of this blog we can see that there is one new feature that is not out fully GA and just in preview called “Site Lifecycle Management” for automating lifecycle tasks across your sites. I’m excited to try this one once its released.
I’ll look forward to seeing Microsoft add more and more features here to help us continually improve the security and governance of our SharePoint environments.
– Antonio